Intro
Page speed is extremely important for your website for several key reasons. First and foremost, no one wants to wait more than 3 to 5 seconds for a page to load—especially when they are looking to make a quick purchase, find specific information, or already have something in mind before they even land on your site. Slow-loading pages frustrate users and can lead to lost sales or missed opportunities. Additionally, page speed becomes even more critical when visitors have poor phone service or unreliable Wi-Fi connections. In those situations, having a website optimized to load quickly despite slow or inconsistent internet is essential to keep users engaged. One of the biggest and most common culprits behind slow load times is surprisingly simple: large image file sizes. It’s important to clarify that when we say “large images,” we’re not just talking about images with big dimensions or high resolutions. Rather, we mean images that have large file sizes—meaning they take up a lot of storage space and bandwidth. These oversized files take longer for browsers to download and render, causing delays in page loading. By focusing on reducing image file sizes without sacrificing too much visual quality, you can dramatically improve your website’s speed, user experience, and ultimately your search engine rankings.
What is Image Compression?
Image compression reduces the file size of an image. There are two types:
- Lossless: Shrinks file size without reducing visual quality.
- Lossy: Shrinks file size by sacrificing a bit of quality — often unnoticeably.
If you aren’t familiar with image compression, in the simplest terms, it means reducing the file size of an image to make it easier and faster to load on the web. When it comes to compressing images, there are two main types of compression: lossless and lossy. Lossless compression reduces the file size without sacrificing any of the image’s original quality. This means the image looks exactly the same as the original, just with a smaller file size. On the other hand, lossy compression reduces the file size by sacrificing some of the image quality. While lossy compression can significantly shrink the file size—often much more than lossless compression—it does so by slightly degrading the image. This degradation might show up as a subtle blur, reduced sharpness, or some graininess. When it comes to websites, most developers and designers opt for lossy compression because it drastically improves page load speed without noticeably affecting the user experience. In fact, most users don’t really scrutinize images too closely when they’re browsing websites—they’re usually looking for information rather than judging photo quality. That subtle blur or graininess caused by lossy compression is often unnoticeable, especially when viewed on smaller screens or within the context of the website’s overall design. So, lossy compression strikes a practical balance between keeping images visually appealing and ensuring your site loads quickly.
Recommended Image Sizes
Here’s a general guideline for web image sizes:
- Hero/Background Images: 200–400 KB
- Other Images: Below 100 KB(Idealy 20-40 KB)
A very common mistake that can absolutely kill your page speed is using images that are larger than 1 megabyte (MB). Simply replacing just one image of that size with a properly compressed version can significantly improve your website’s loading time. As a general rule, aside from hero section images or background images—which ideally should be kept between 200 to 400 KB—most other images on your site should be well below 100 KB. In fact, after proper compression, many images can be reduced to the 20 to 40 KB range without a noticeable loss in quality. In the next section, you’ll discover a simple method that typically helps reduce most image sizes to under 100 KB, making your site much faster and more user-friendly.
Convert to WebP
It’s very common for most people to use only JPG or PNG images on their websites, and there’s nothing wrong with that—provided the file sizes are small enough. However, there is often a simple fix that can dramatically improve image file size: converting your images to the WebP format. WebP supports both lossy and lossless compression, making it one of the best options for optimizing images for the web. Fortunately, there are many free tools available online that allow you to convert almost any image format to WebP quickly and easily. Most of the time, simply converting an image to WebP will reduce its file size enough to meet the ideal size thresholds we discussed earlier. If converting to WebP alone doesn’t reduce the image size enough, the next step is to use a WebP compression tool to further shrink the file. Keep in mind that compressing an image more aggressively will reduce its quality, so you’ll need to experiment with different compression rates to find a balance that works for your needs. Compression is essentially a trade-off between image quality and file size, so it’s ultimately up to you to decide when the picture still looks good enough while being small enough to optimize your website’s performance.
Compression Rate Example
Use these tools:
Using these tools is straightforward. First, try converting your image to the WebP format. If the resulting file size meets the size thresholds described earlier, you can simply use that image as is. However, if the file is still too large after conversion, the next step is to compress the WebP image further using a WebP compression tool. These compressors typically allow you to set a compression level as a percentage from 0 to 100. A setting of 100% means maximum compression, which results in the smallest file size but also the lowest image quality. Conversely, lower percentages retain more image detail and higher quality but produce larger file sizes. Your goal is to find the balance that works best for your specific image—keeping the file size as small as possible without sacrificing too much visual quality.
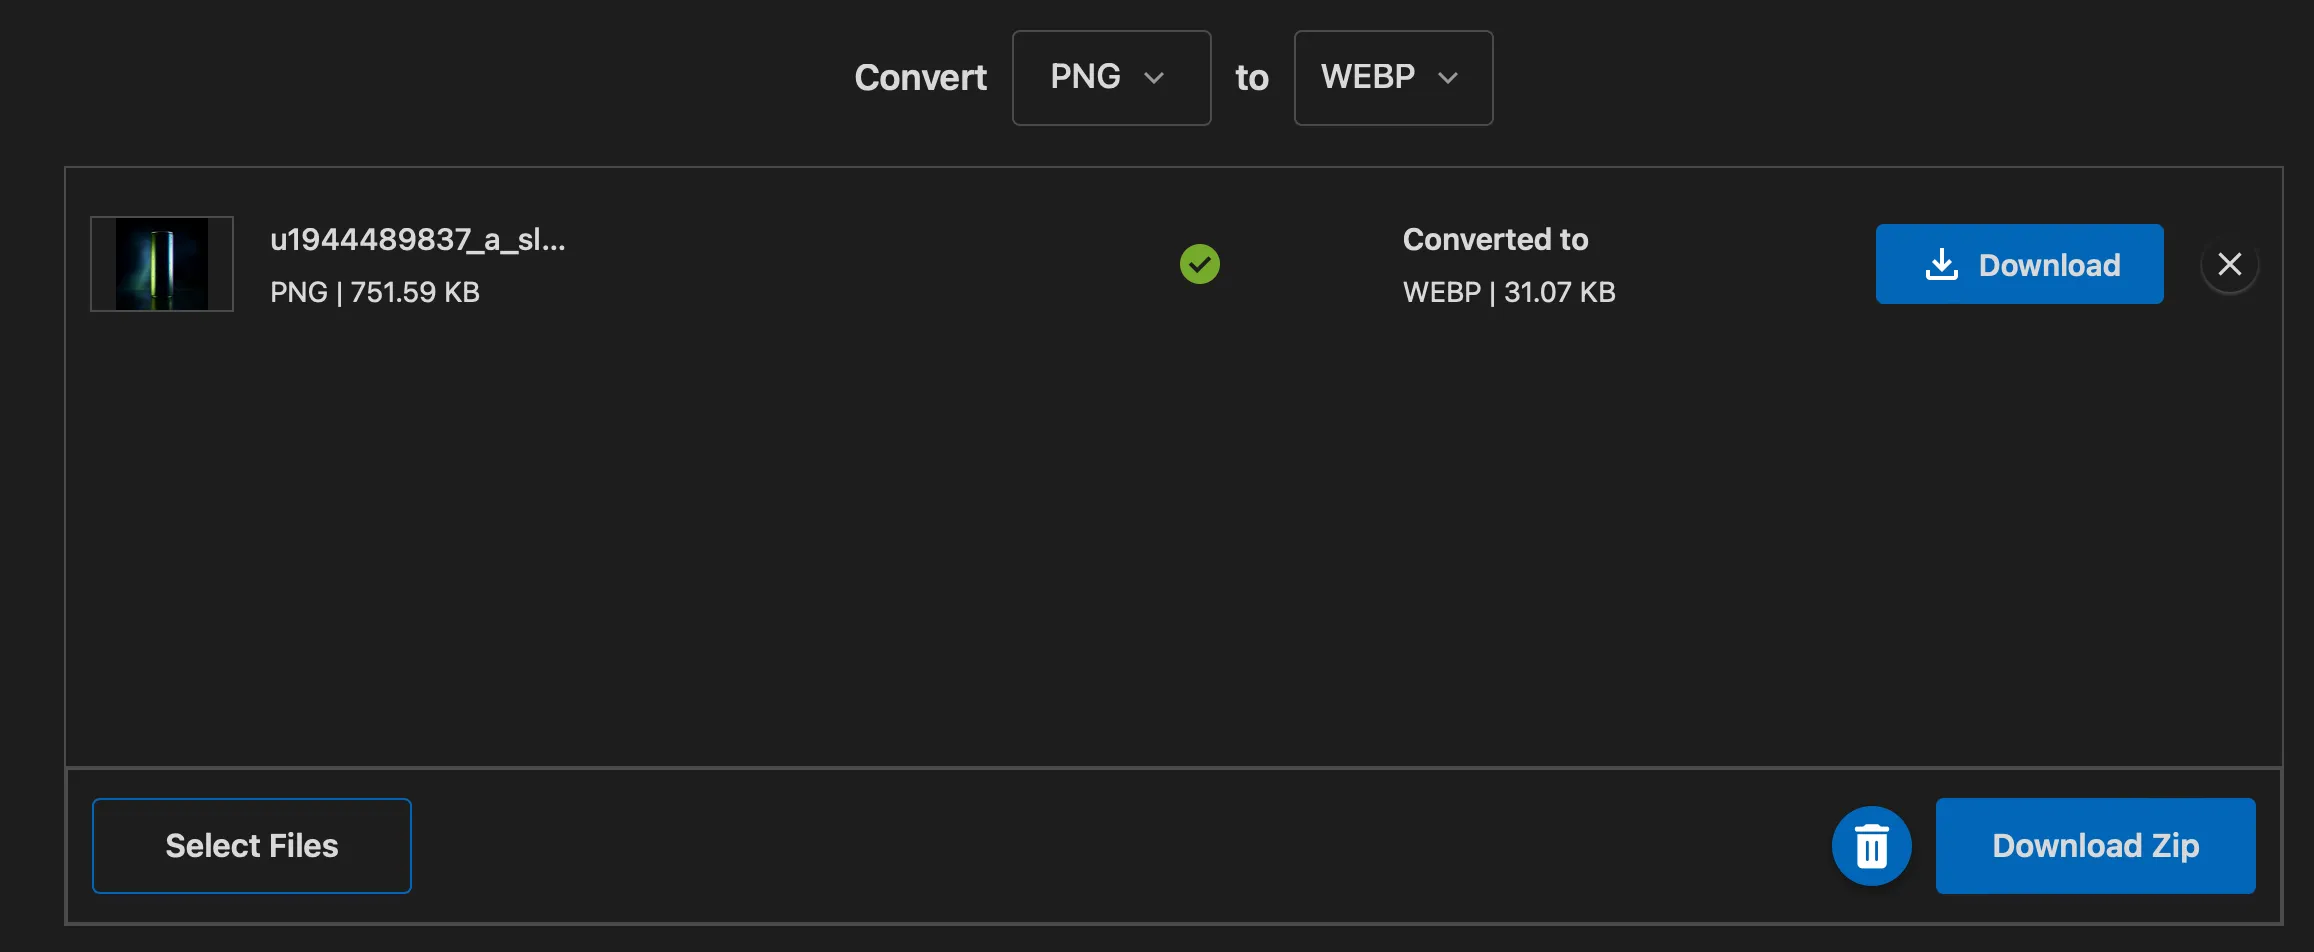
This image converted from PNG to WEBP is small enough to just use.
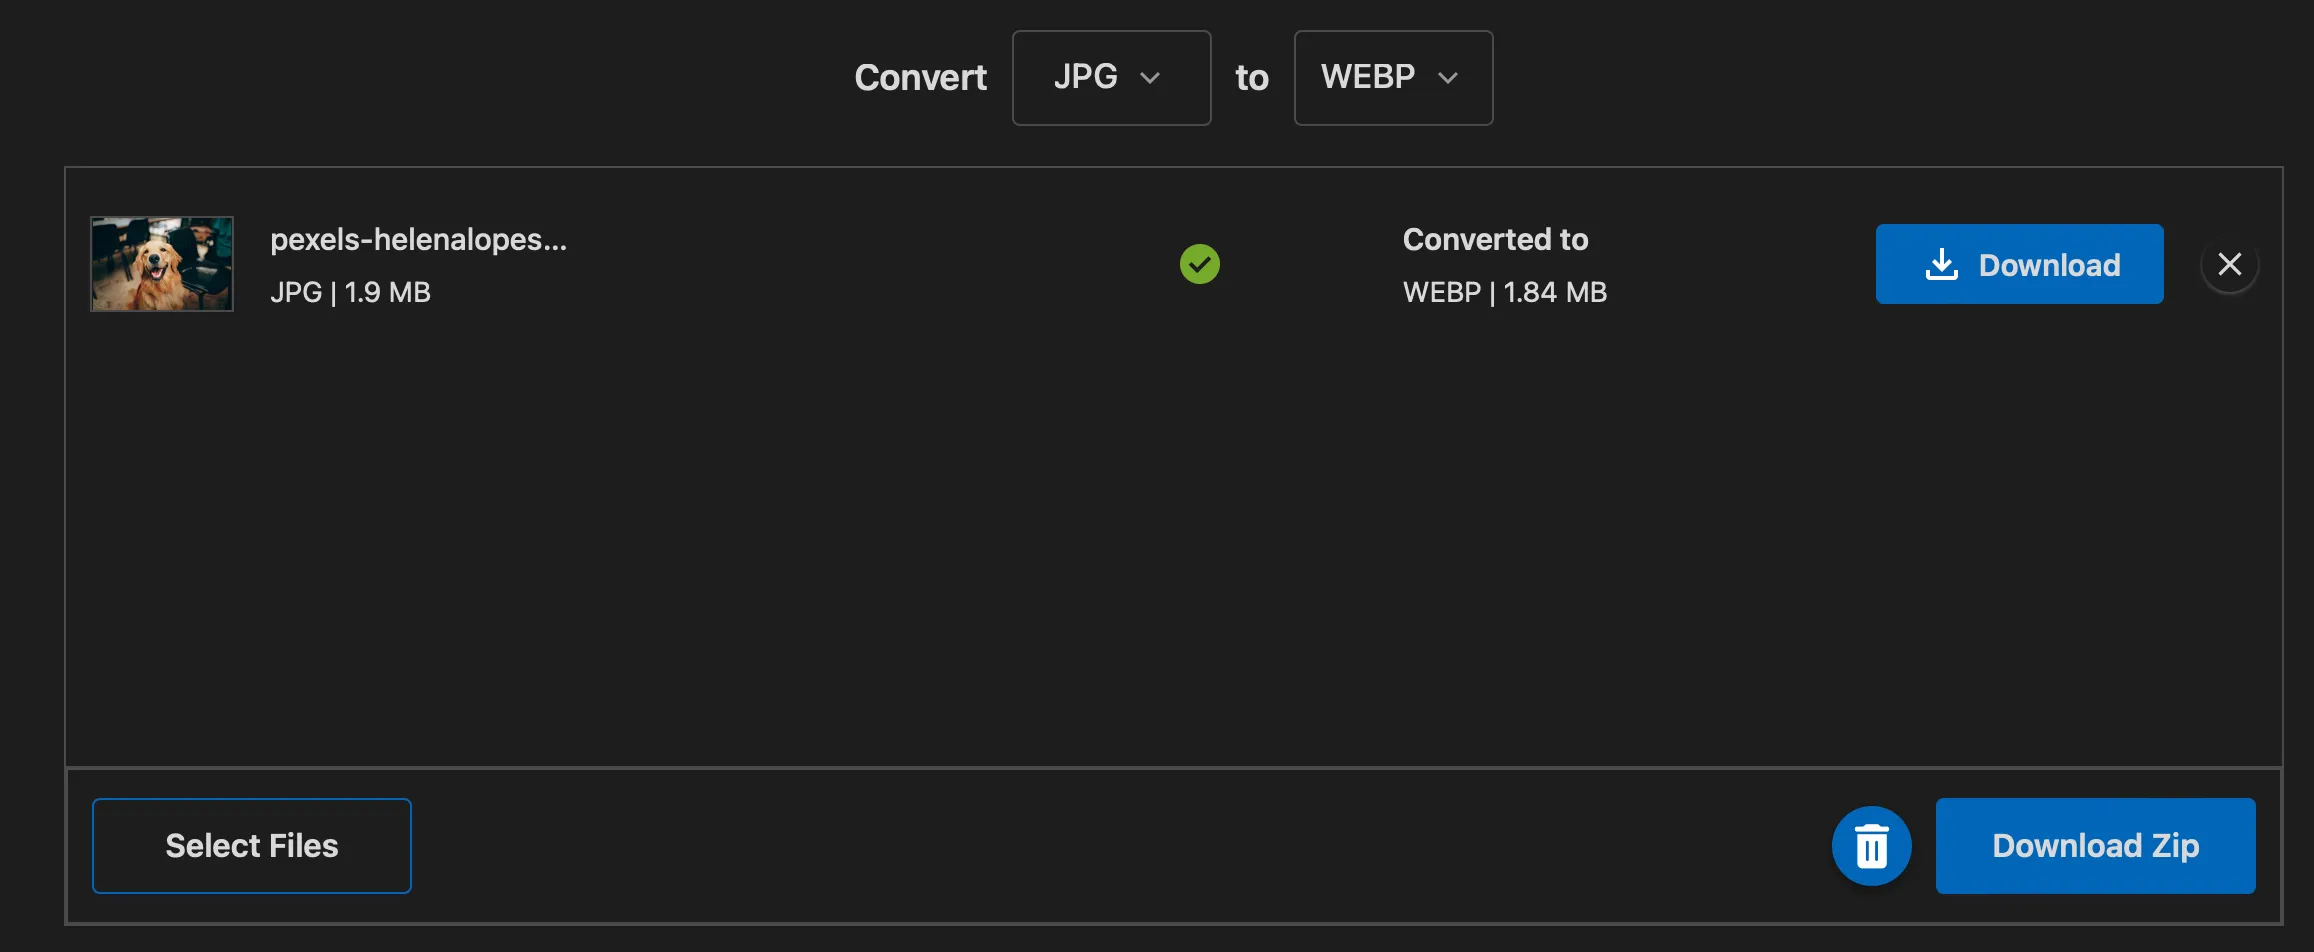
This image converted from JPG to WEBP is still to large needs further compression.
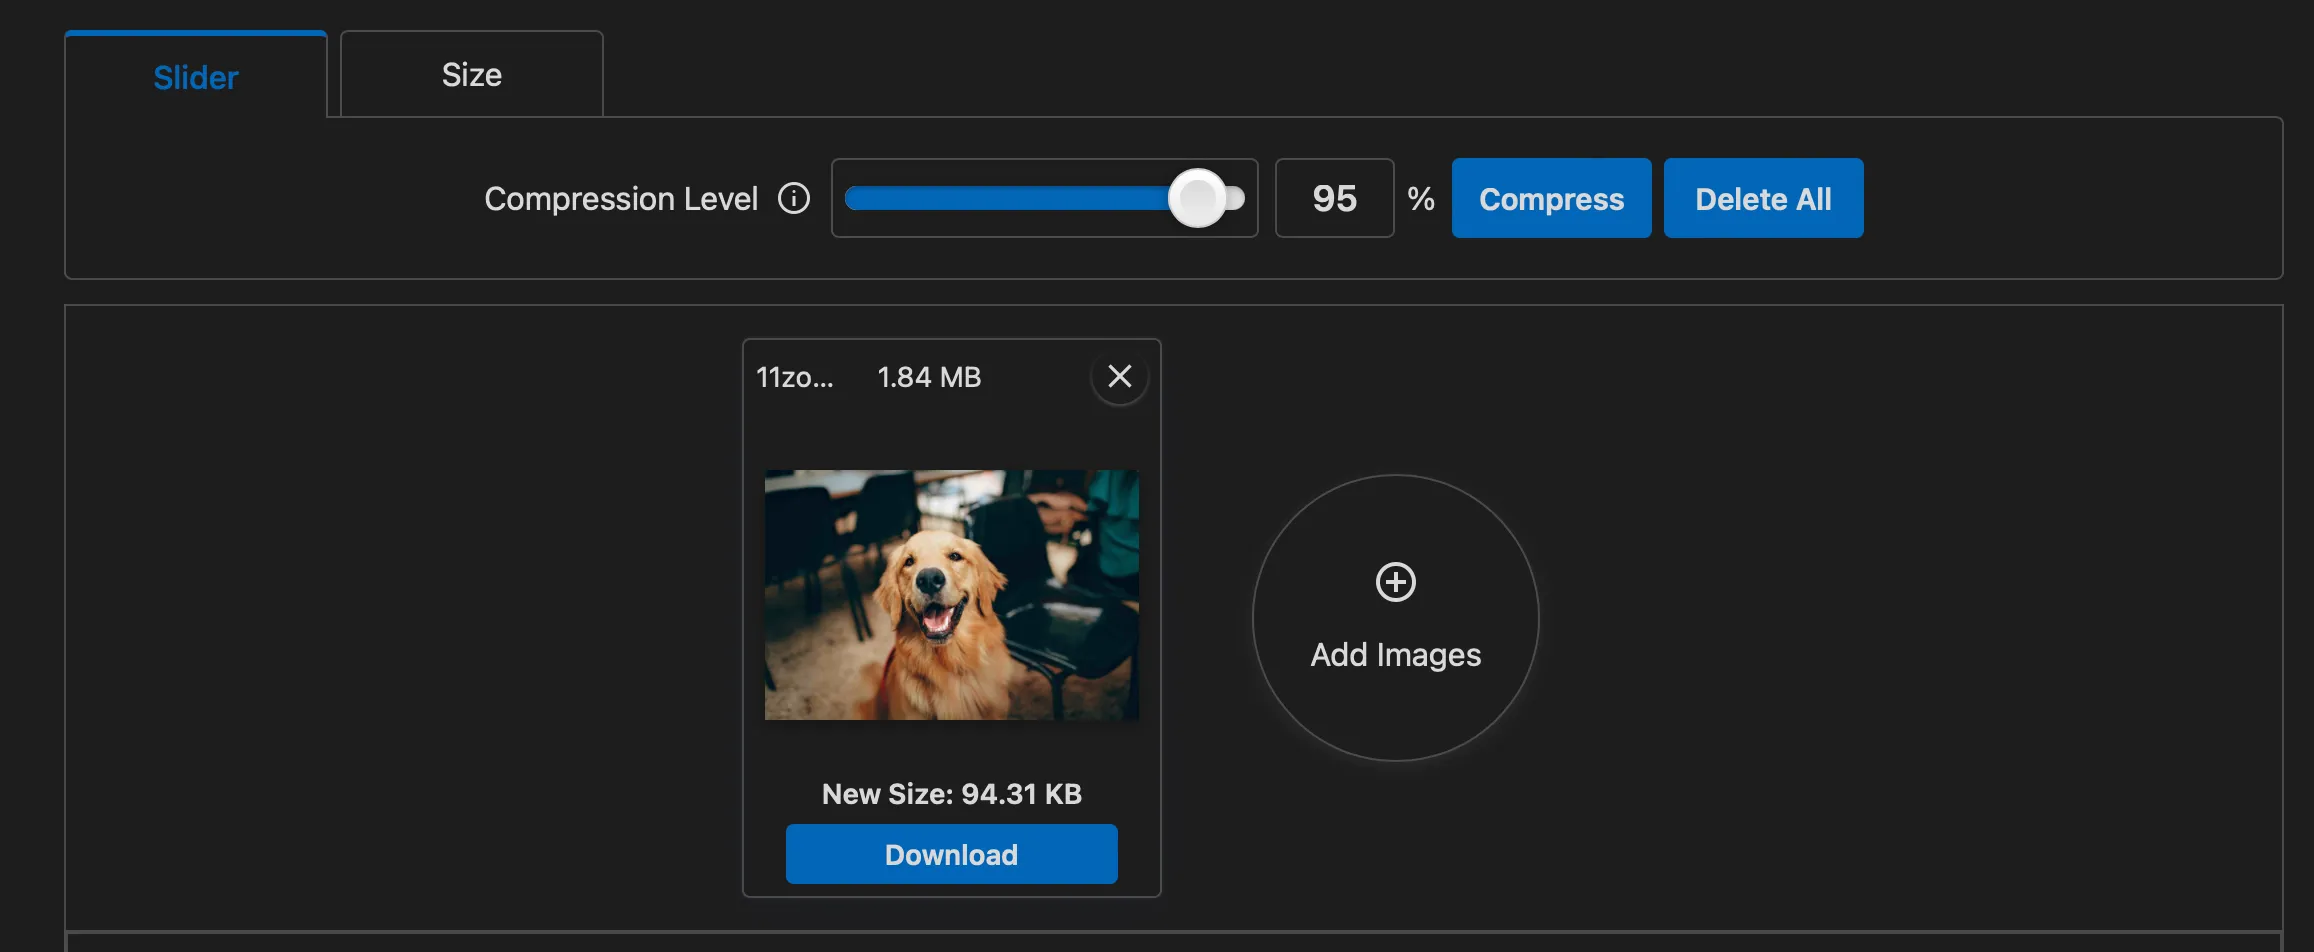
This image is small enough after using compression level of 95%.
Conclusion
Compressing images is one of the simplest ways to improve page speed and SEO. Use WebP, aim for images under 100 KB, and adjust compression based on how much quality you’re willing to trade for performance.